Promotion Management
In the Promotions section, you can create and manage promotions applicable in your store. These promotions can be discount, product discount, or other special offers.
1. Promotions Page View
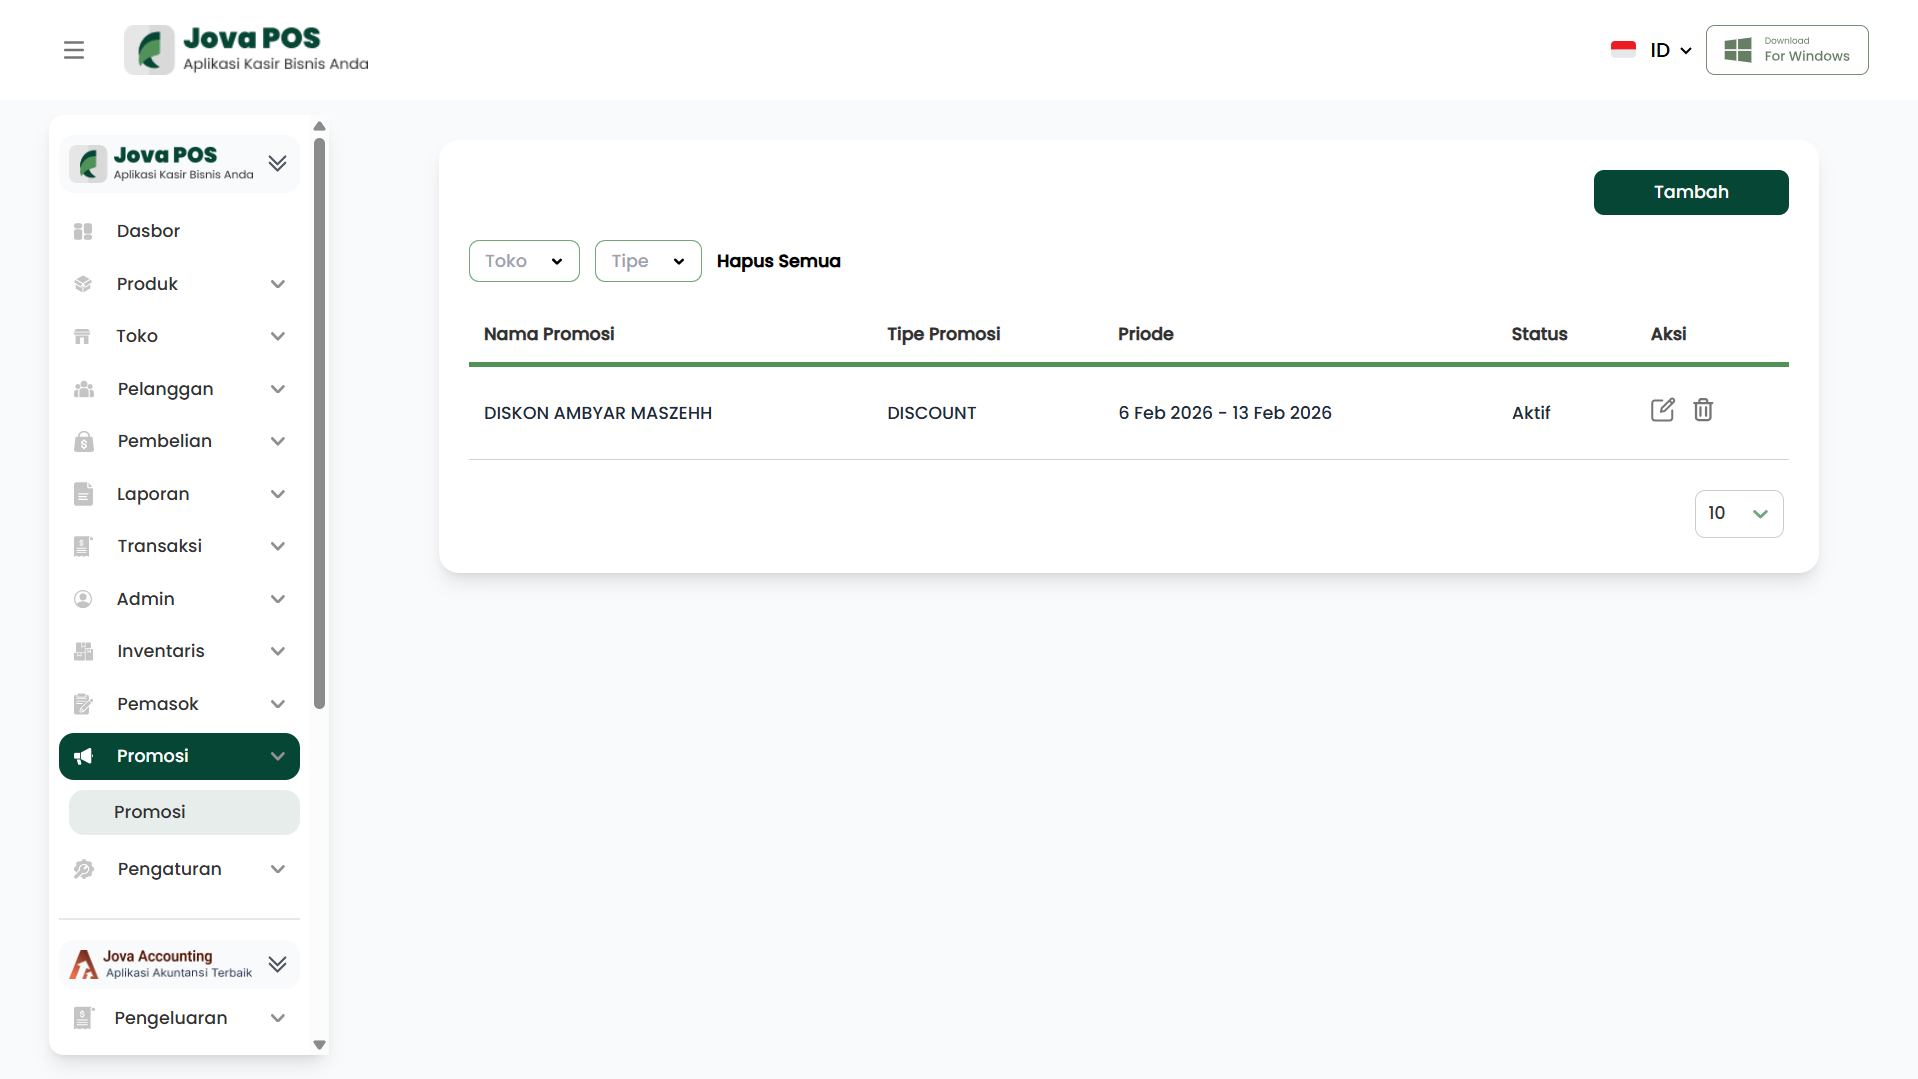
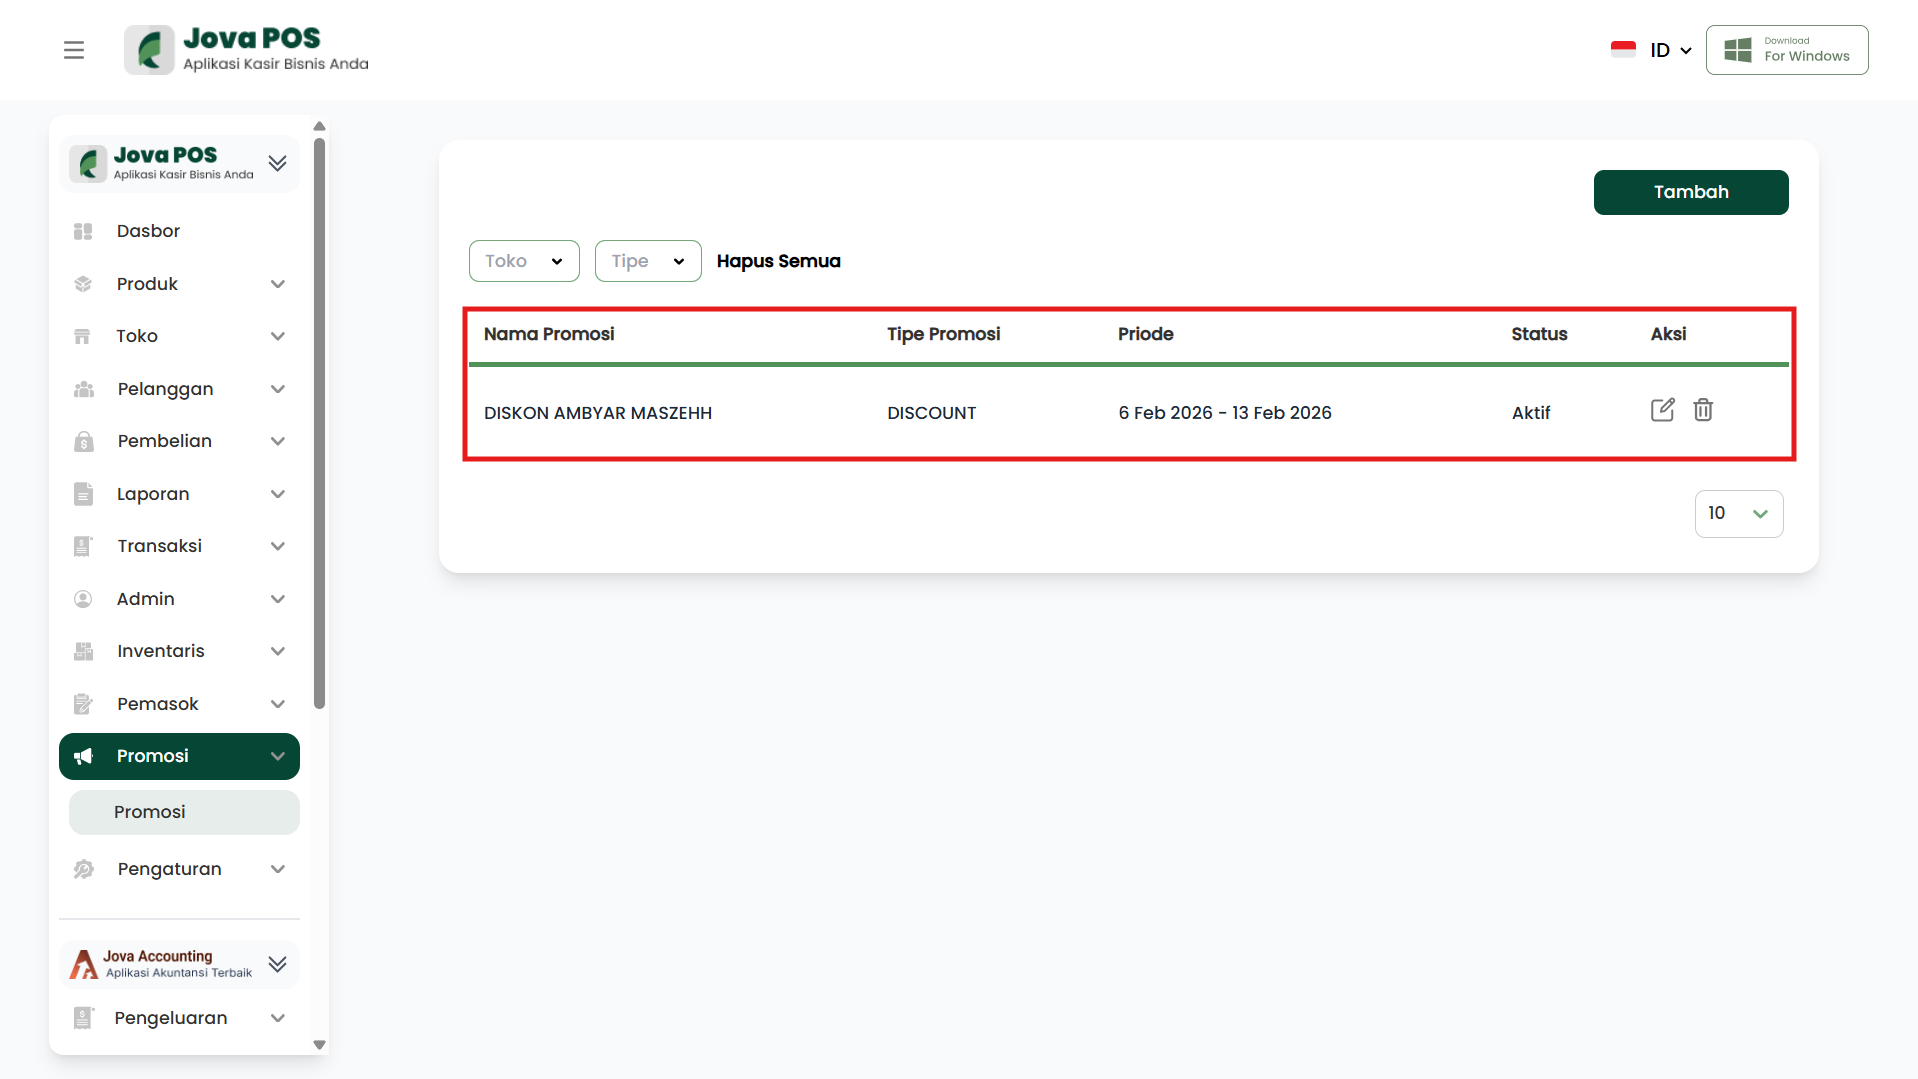
The Promotions page displays a list of all promotions you have created and manages their status. You can view details of each promotion, such as promotion name, promotion type, promotion period, and promotion status.
Promotions Page View:
- Promotion Name: The name of the applied promotion.
- Promotion Type: The type of promotion selected, e.g., Discount or Voucher.
- Promotion Period: The time range the promotion is valid, from start date to end date.
- Status: Whether the promotion is active or not.
Example Display:
2. Adding a New Promotion
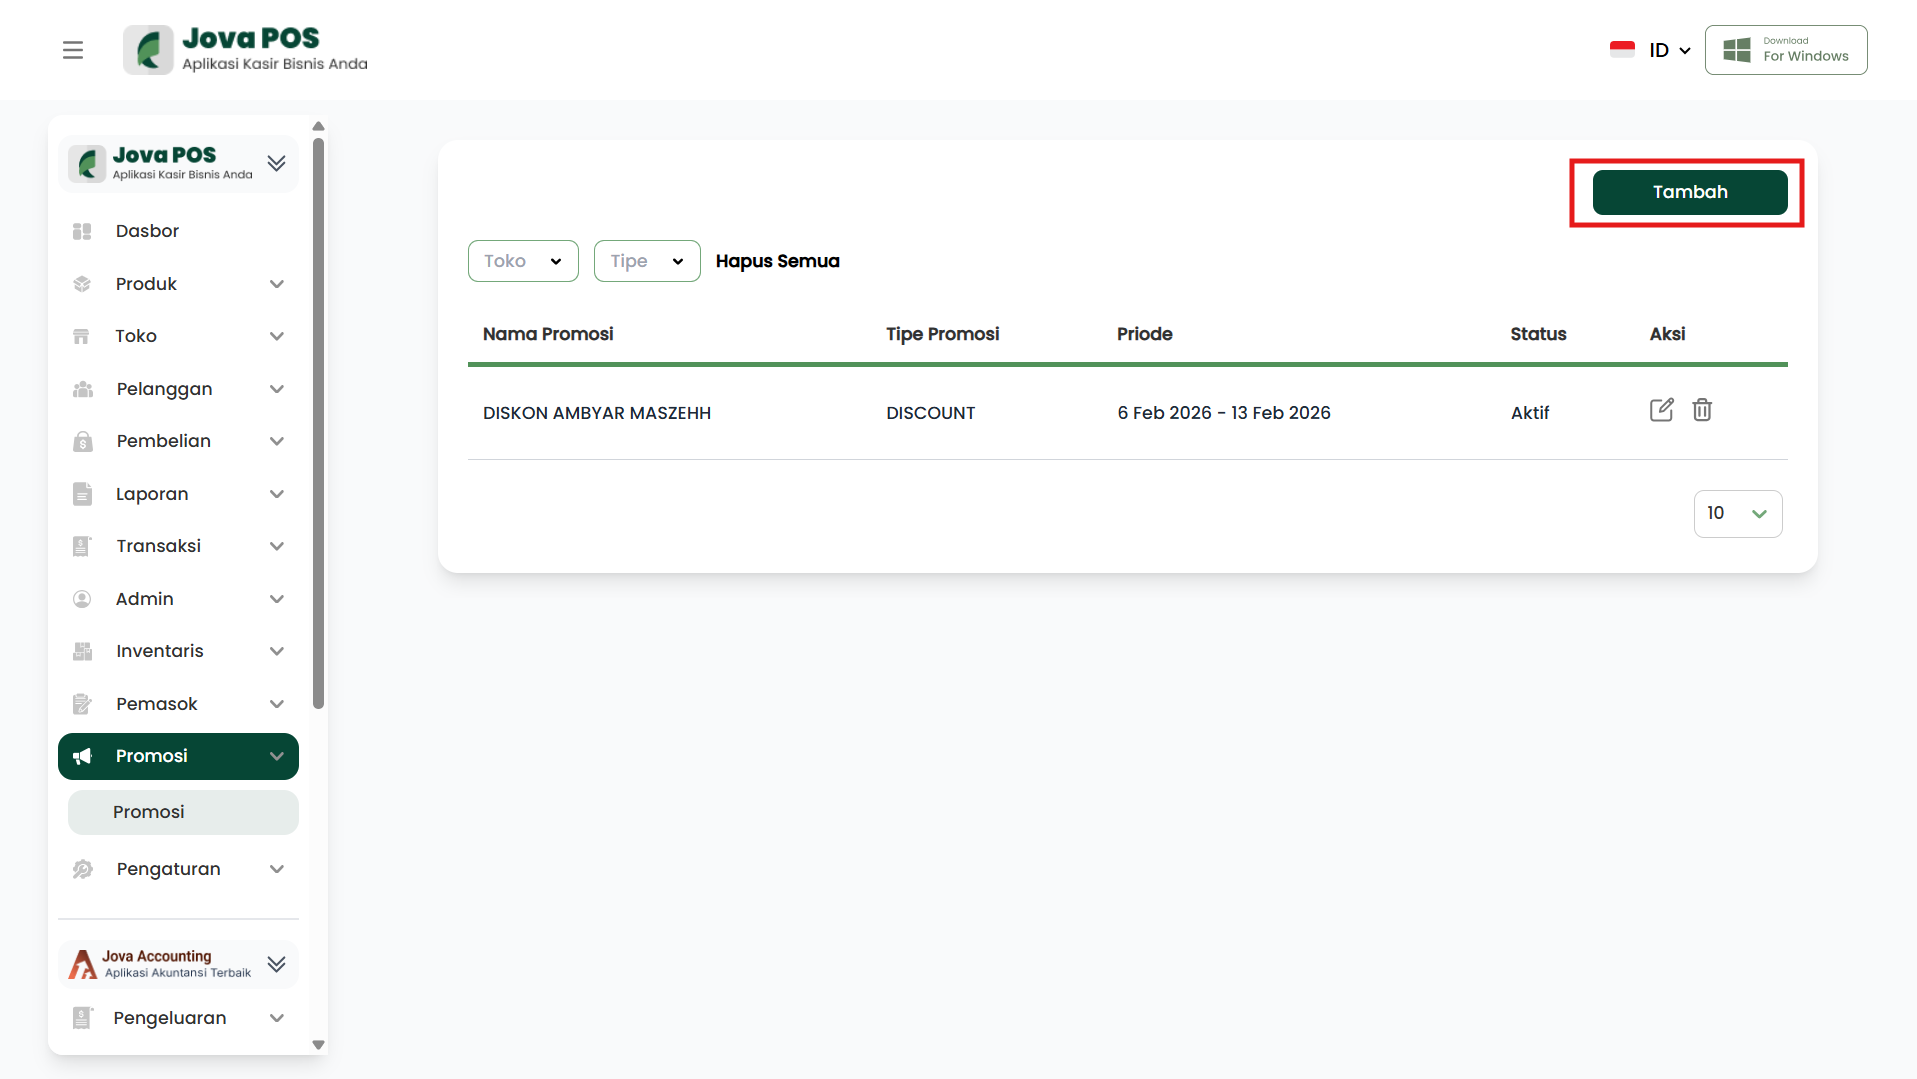
To add a new promotion, click the Add button located at the top right of the page.
Steps:
2.1 Click "Add" to Add a New Promotion
- On the promotions page, click the Add button located at the top right.
- The form to add a new promotion will appear.
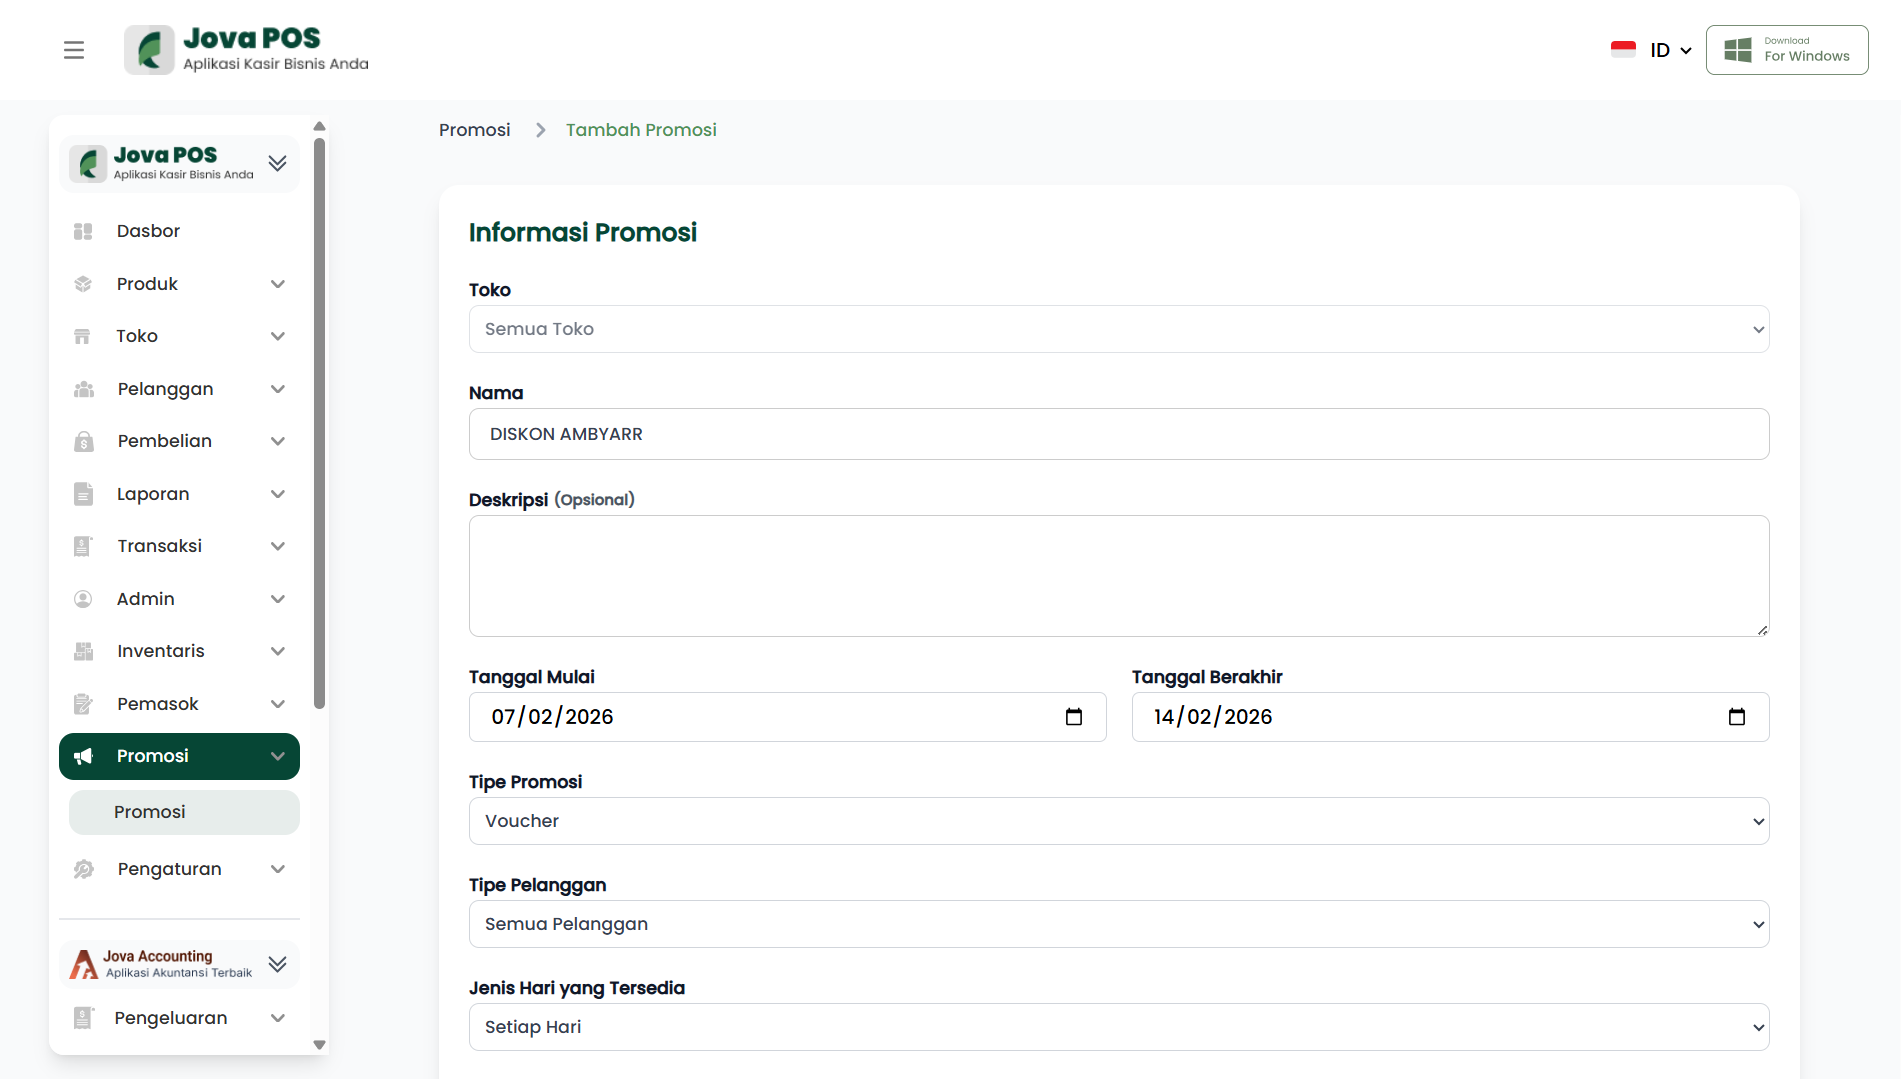
2.2 Filling in the Promotion Form
- Promotion Name: Enter the desired promotion name.
- Example: BIG DISCOUNT.
- Description (Optional): Fill in the promo description if needed.
- Start Date: Select the promotion start date.
- Example: 07/02/2026.
- End Date: Select the promotion end date.
- Example: 14/02/2026.
- Promotion Type: Select the promotion type, e.g., Voucher or Discount.
- Customer Type: Determine who is eligible for this promotion, e.g., All Customers.
- Available Days: Determine which days the promotion is valid, e.g., Every Day.
Promotion Form:
3. Discount or Voucher Selection Form
After selecting the Promotion Type, the form will adjust according to your choice.
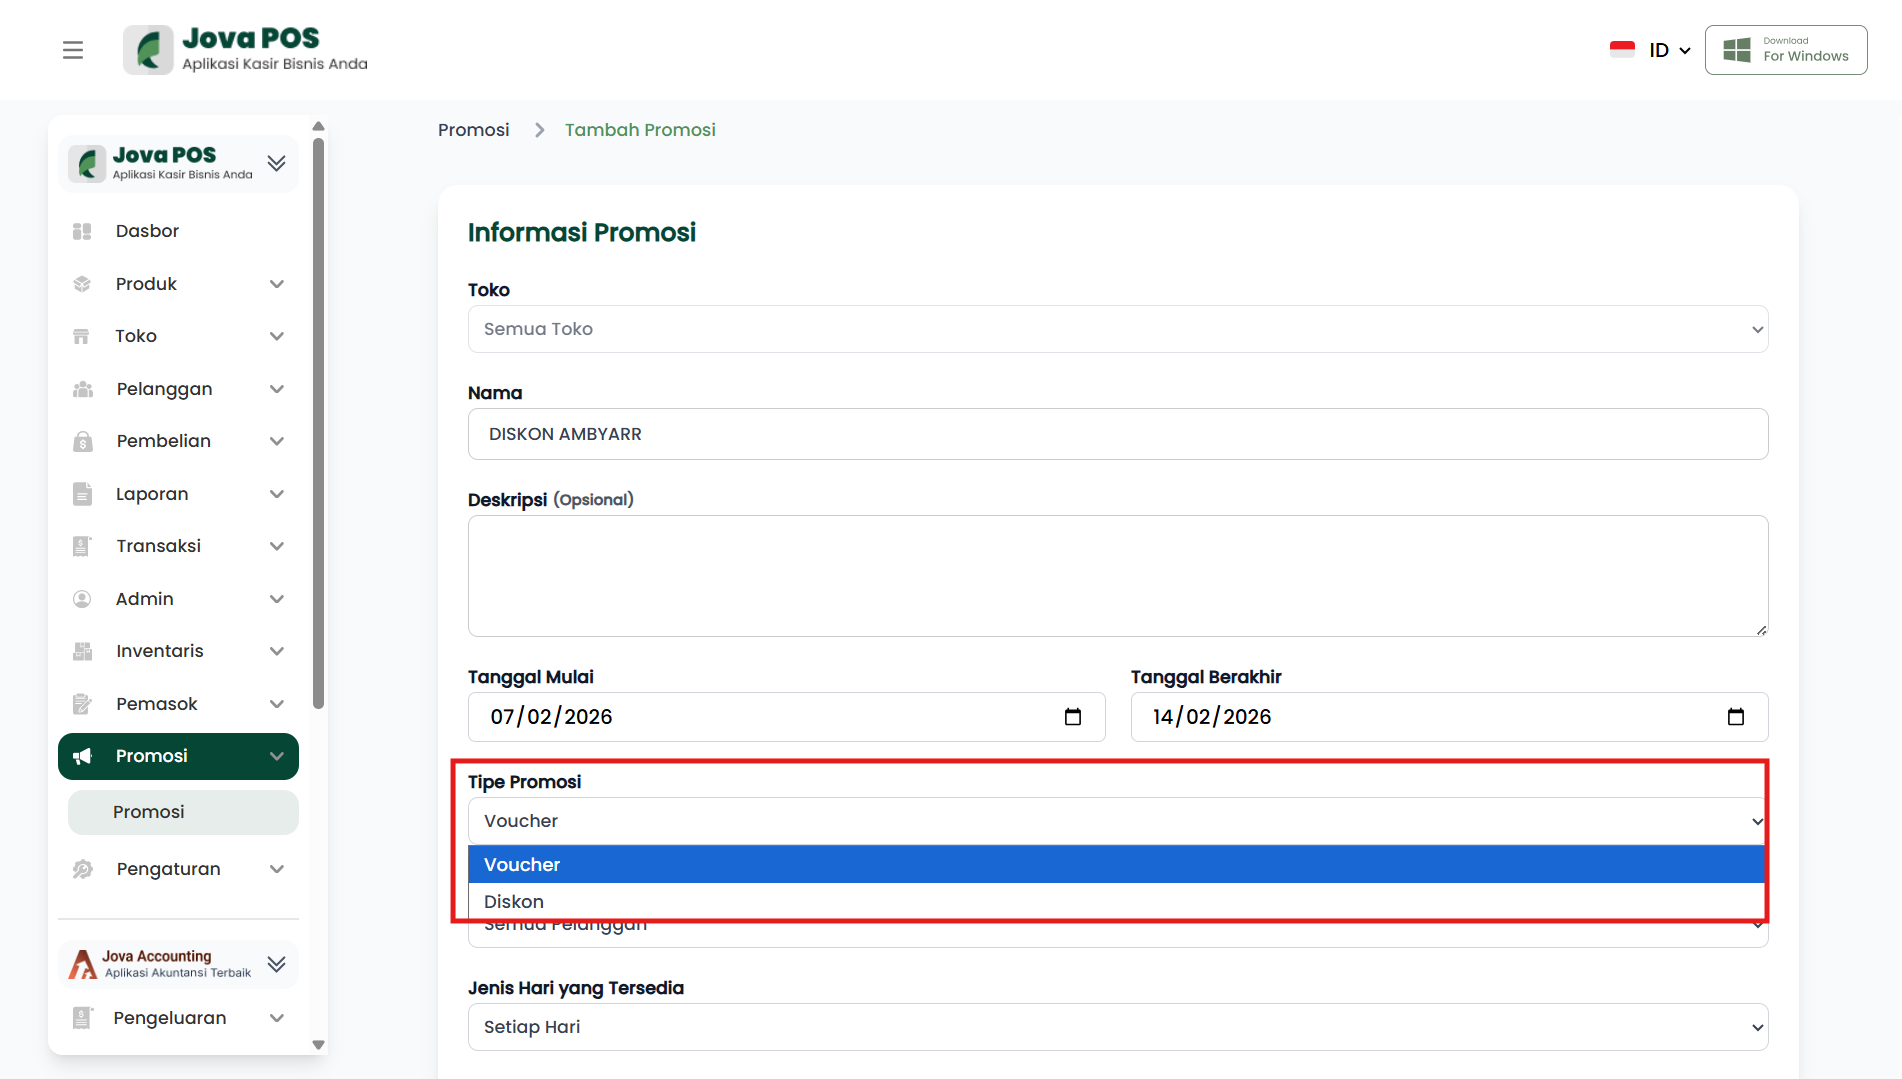
3.1. If you select Discount:
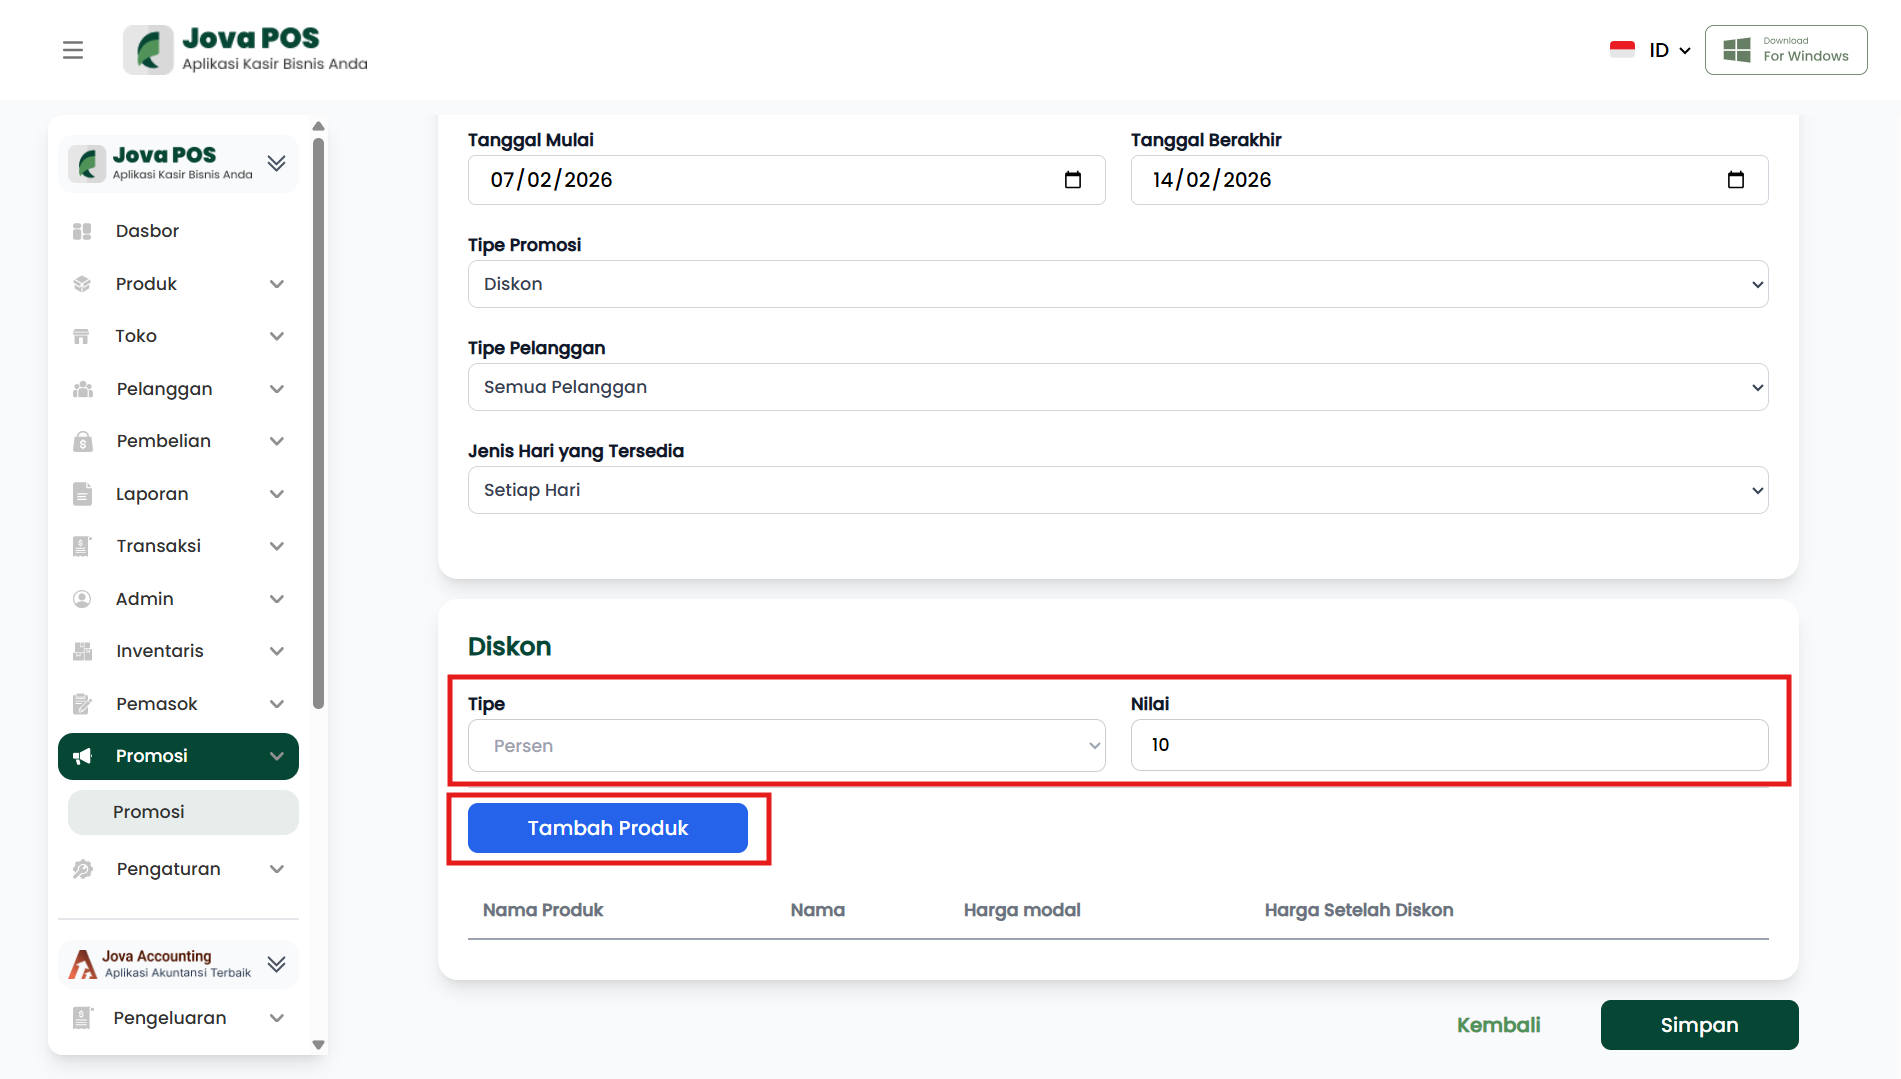
After selecting Discount, the form for setting the discount will appear, and you can configure the details.
Discount Form View:
- Type: Select the discount type, e.g., for Amount or Percentage.
- Value: Determine the discount value to be given.
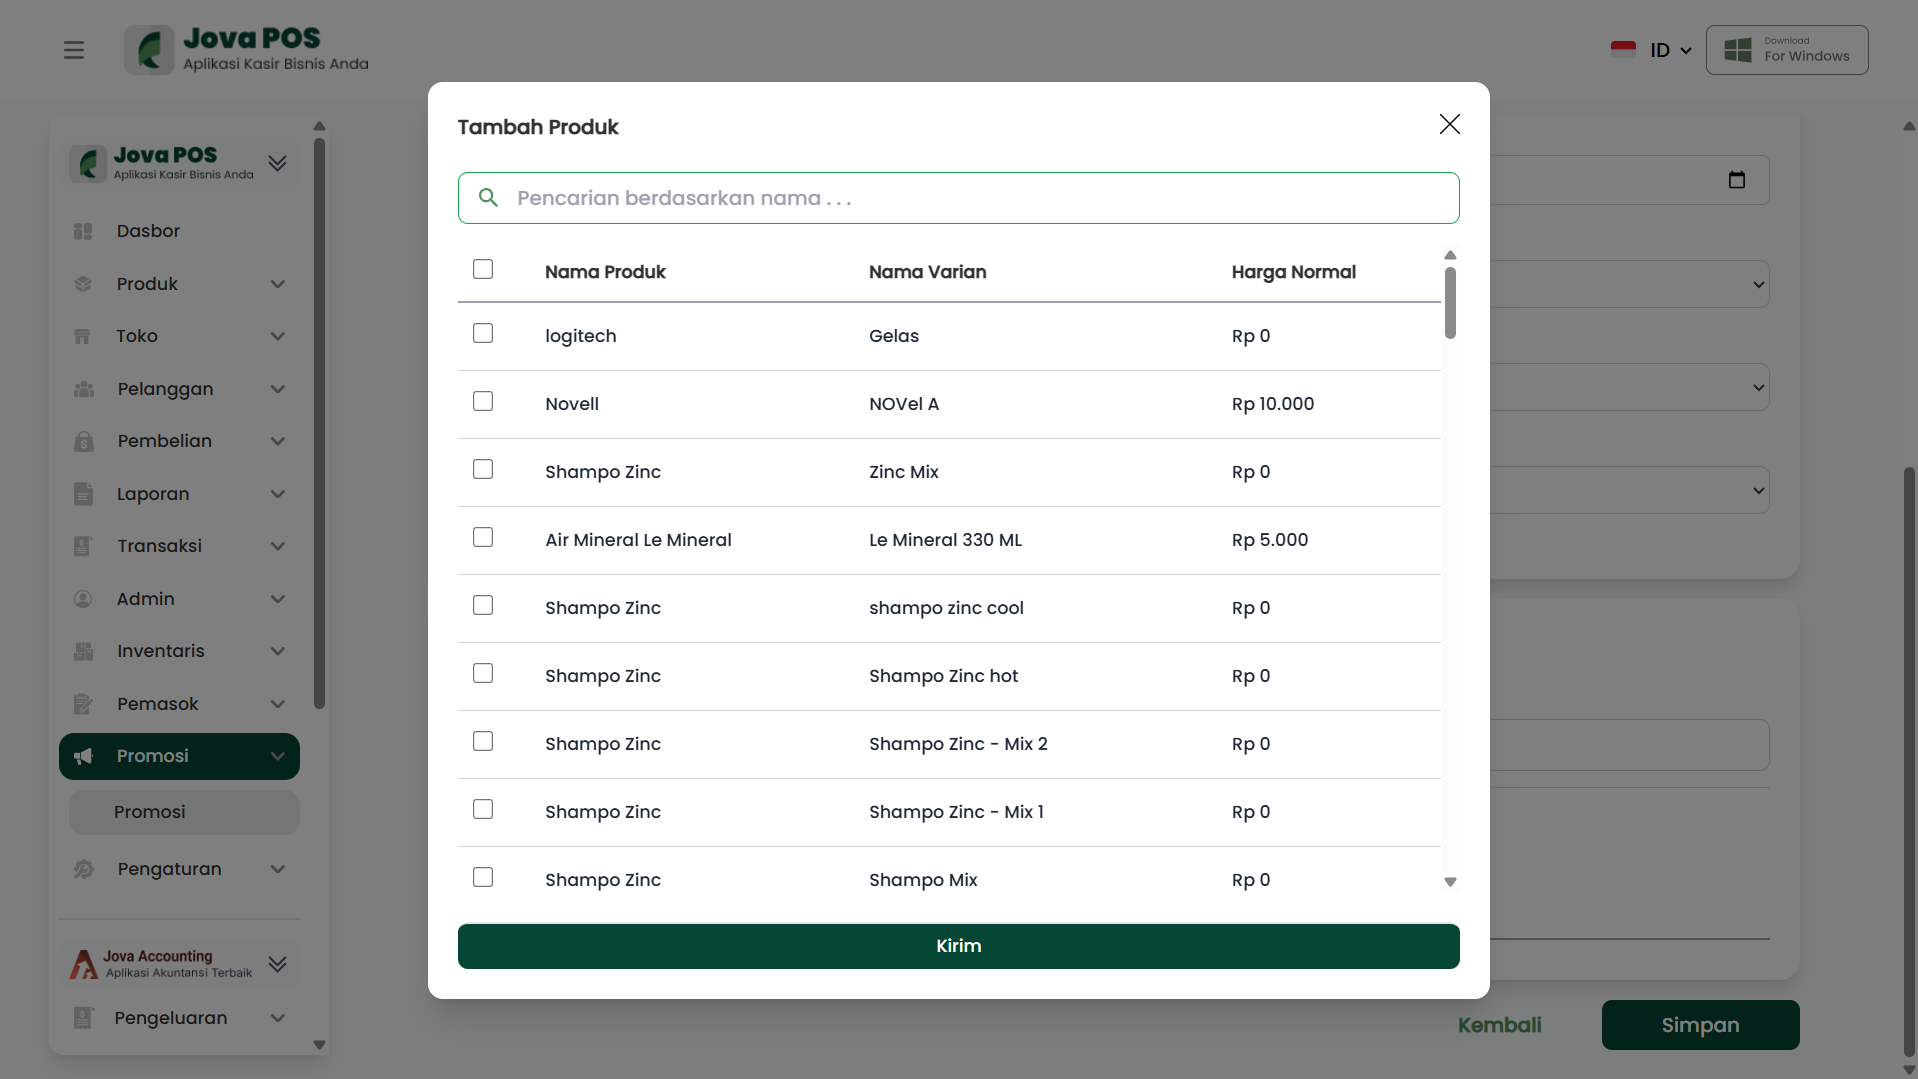
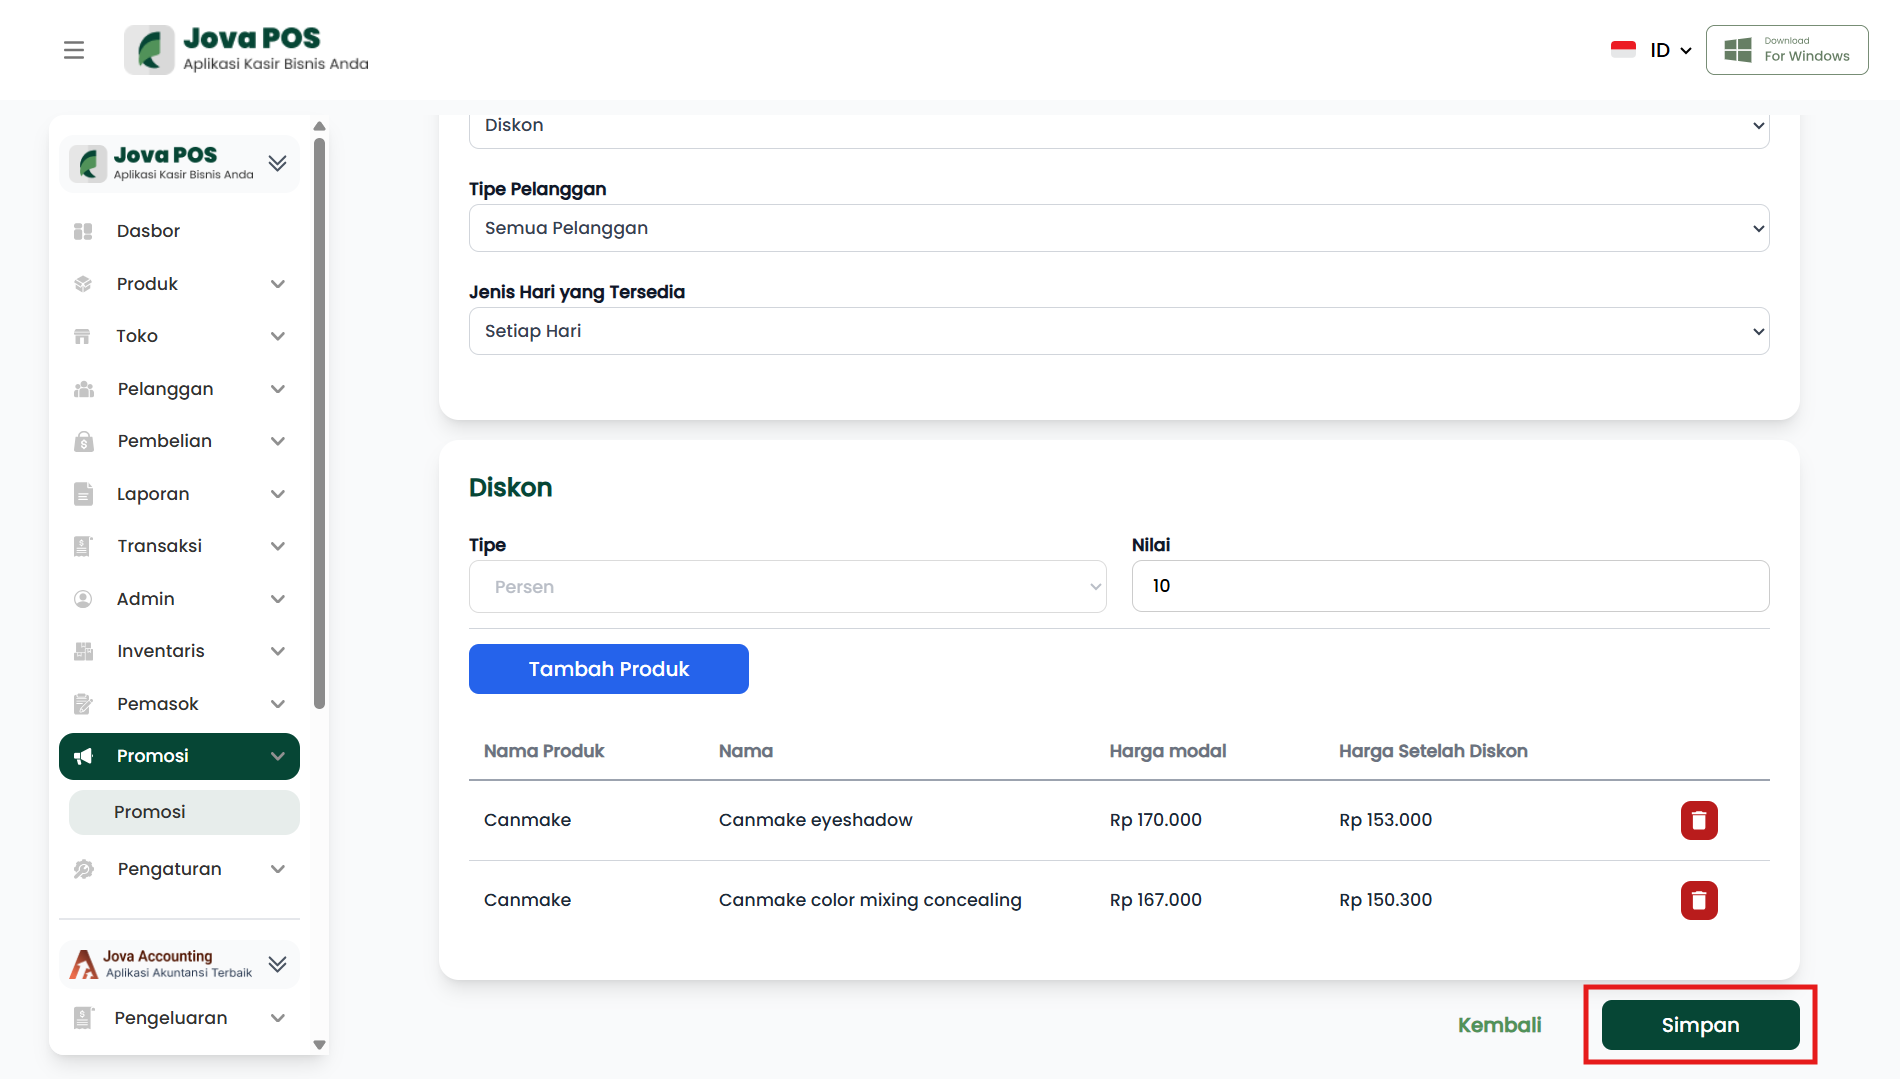
- Add Product: Select the products to be discounted. You can select multiple products.
3.2. If you select Voucher:
If you select Voucher, the form for setting the voucher will appear, and you can fill in details such as Voucher Code, Voucher Type, and Voucher Value.
Voucher Form View:
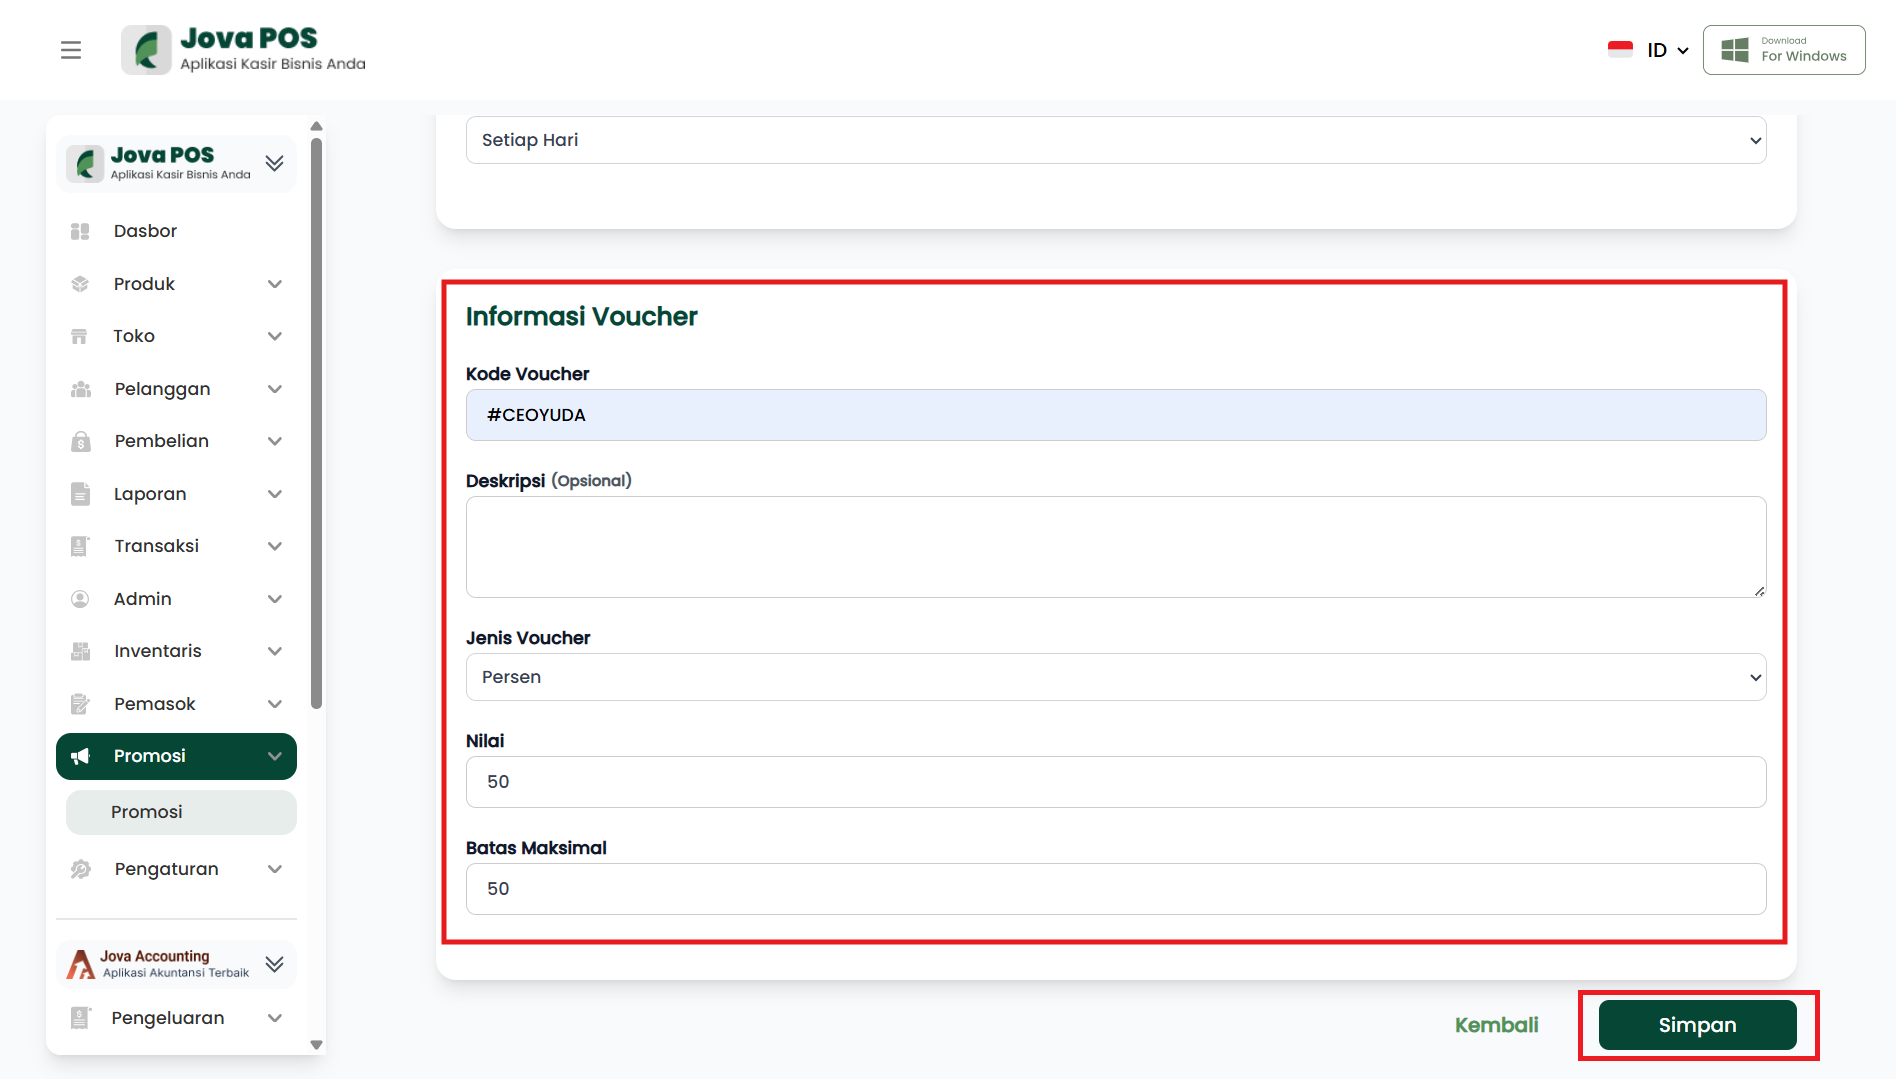
- Voucher Code: Enter the voucher code that customers can use.
- Description: (Optional) Provide a description of the voucher.
- Voucher Type: Determine the type of voucher used, e.g., for Customer.
- Voucher Value: Determine the voucher value to be given.
- Maximum Limit: Determine the maximum usage limit for the voucher.
4. Save Promotion
After all information is filled in, click the Save button to save the promotion you have created.
5. Editing a Promotion
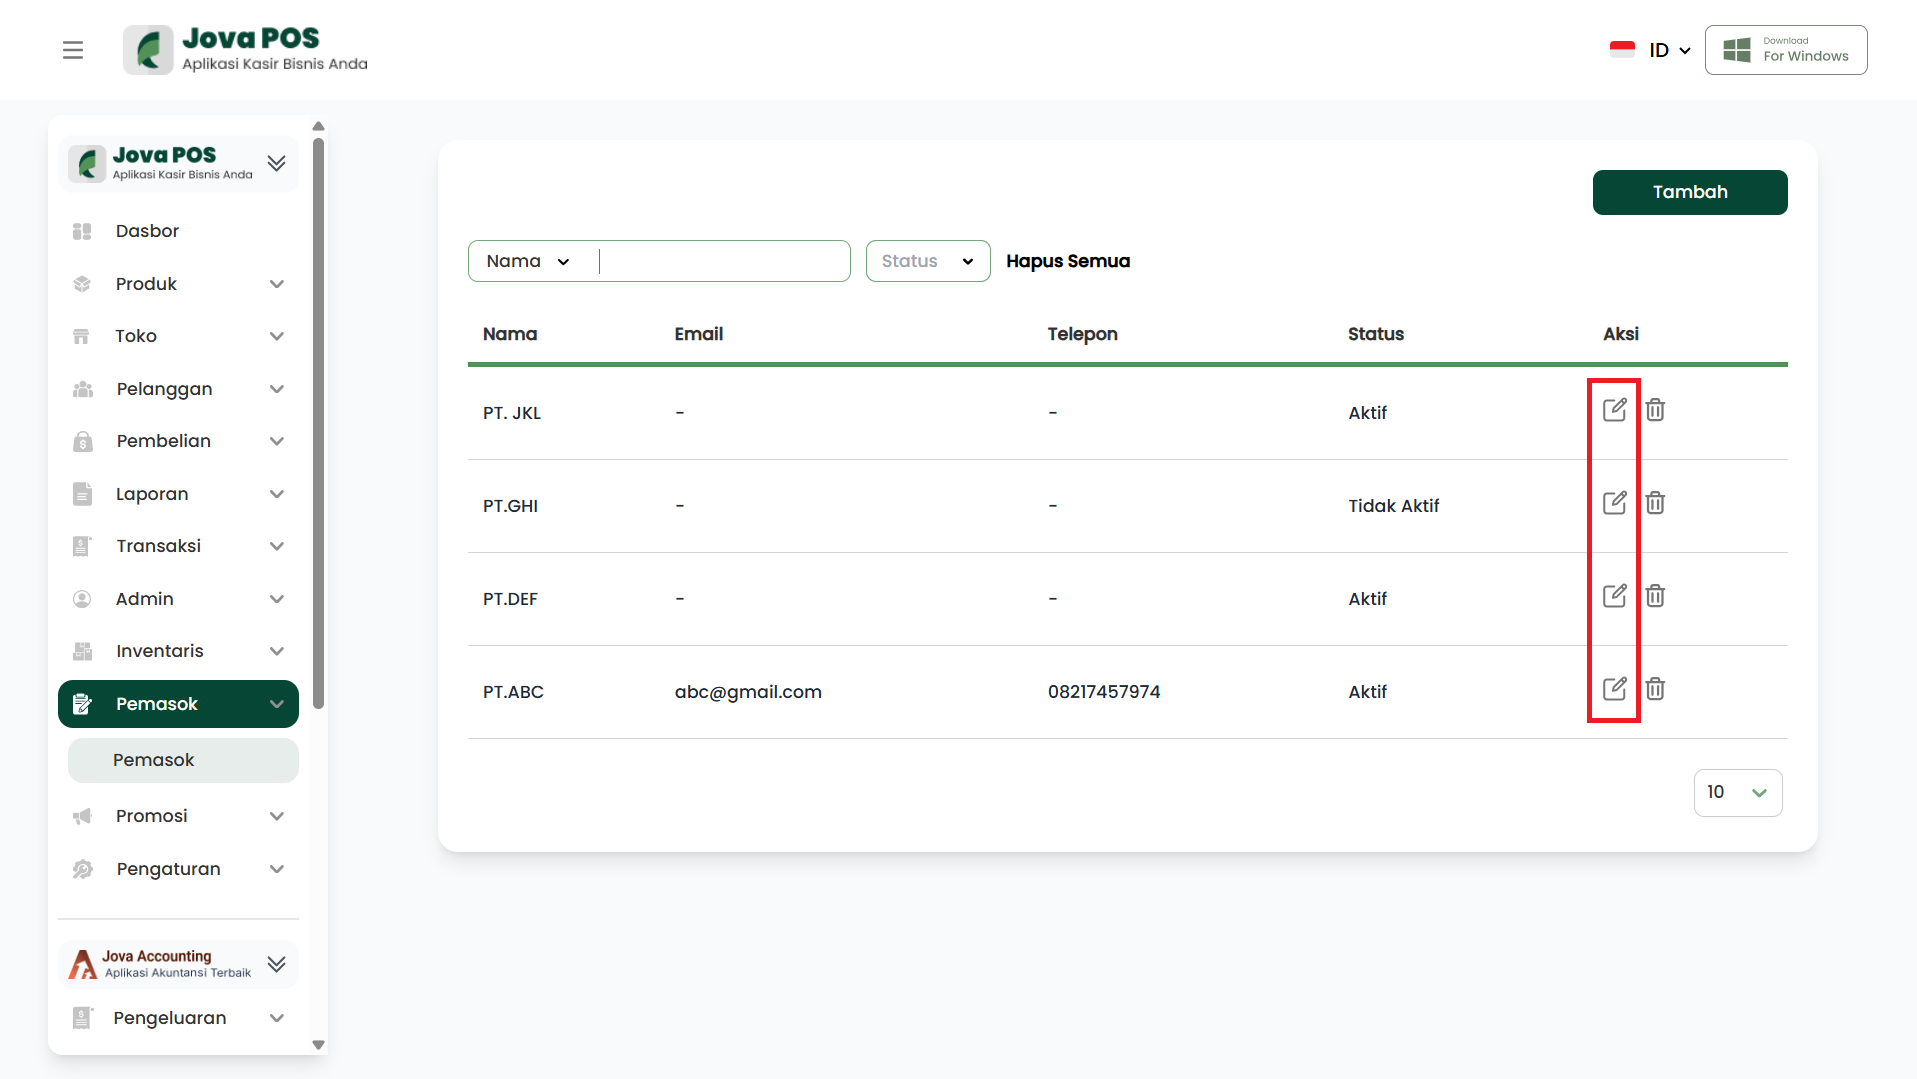
If you want to edit an existing promotion, click the Edit icon in the Action section of the promotion you want to change.
Steps:
- Select the promotion to edit.
- Click the Edit icon.
- Change the promotion details as needed.
- Click Save to save the changes.
Example View:
6. Deleting a Promotion
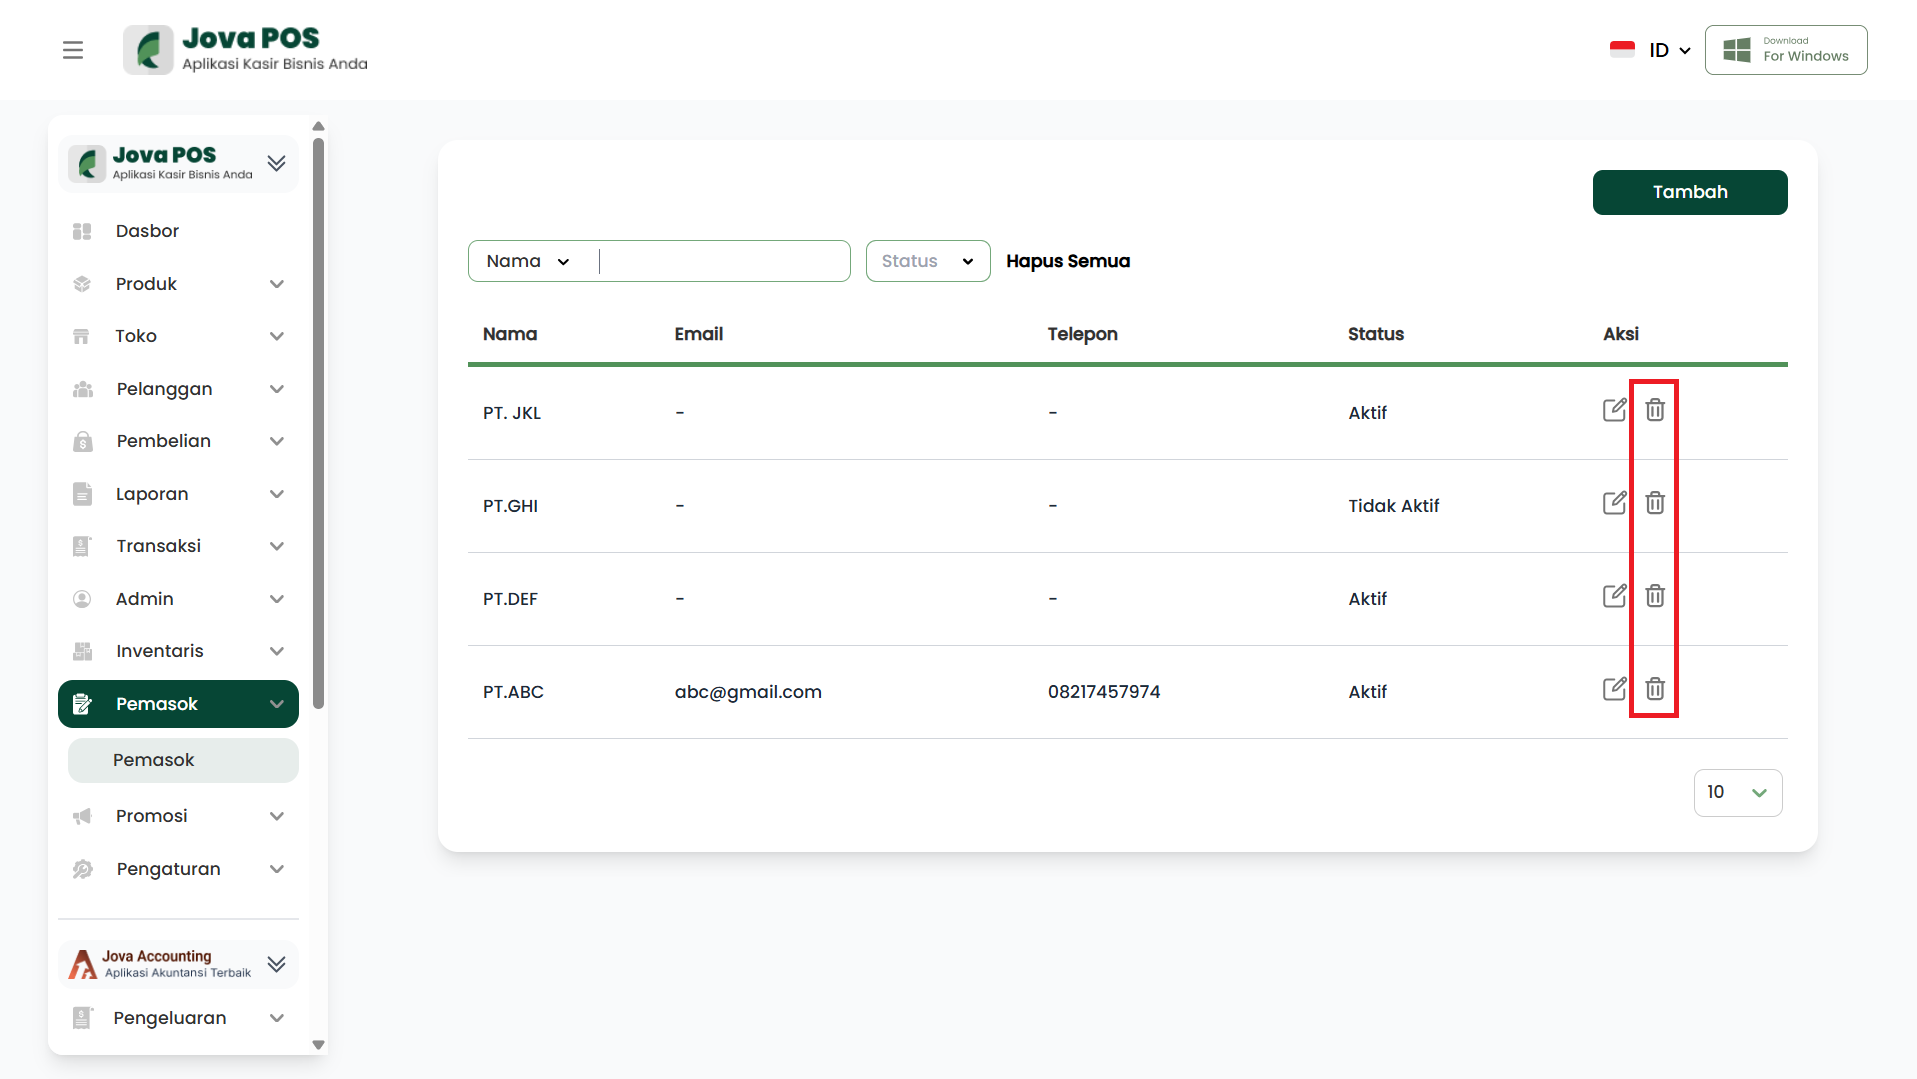
To delete a promotion that is no longer valid or has ended, click the Delete icon in the Action section.
Steps:
- Select the promotion to delete.
- Click the Delete icon.
- Confirm the deletion to ensure you want to delete the promotion.
Example View:
7. Viewing Promotion List
On the Promotions page, you can view a list of all active and expired promotions. You can also filter by promotion name or status.
Promotion List View:
- Promotion Name: The name of each created promotion.
- Promotion Type: The type of promotion applied.
- Promotion Period: The start and end dates of the promotion.
- Status: Indicates whether the promotion is active or not.
Example View:
8. Searching Promotions
The search feature allows you to find promotions by Promotion Name or Status. Simply enter a keyword in the search column and press the Search button.
Promotion Search View:
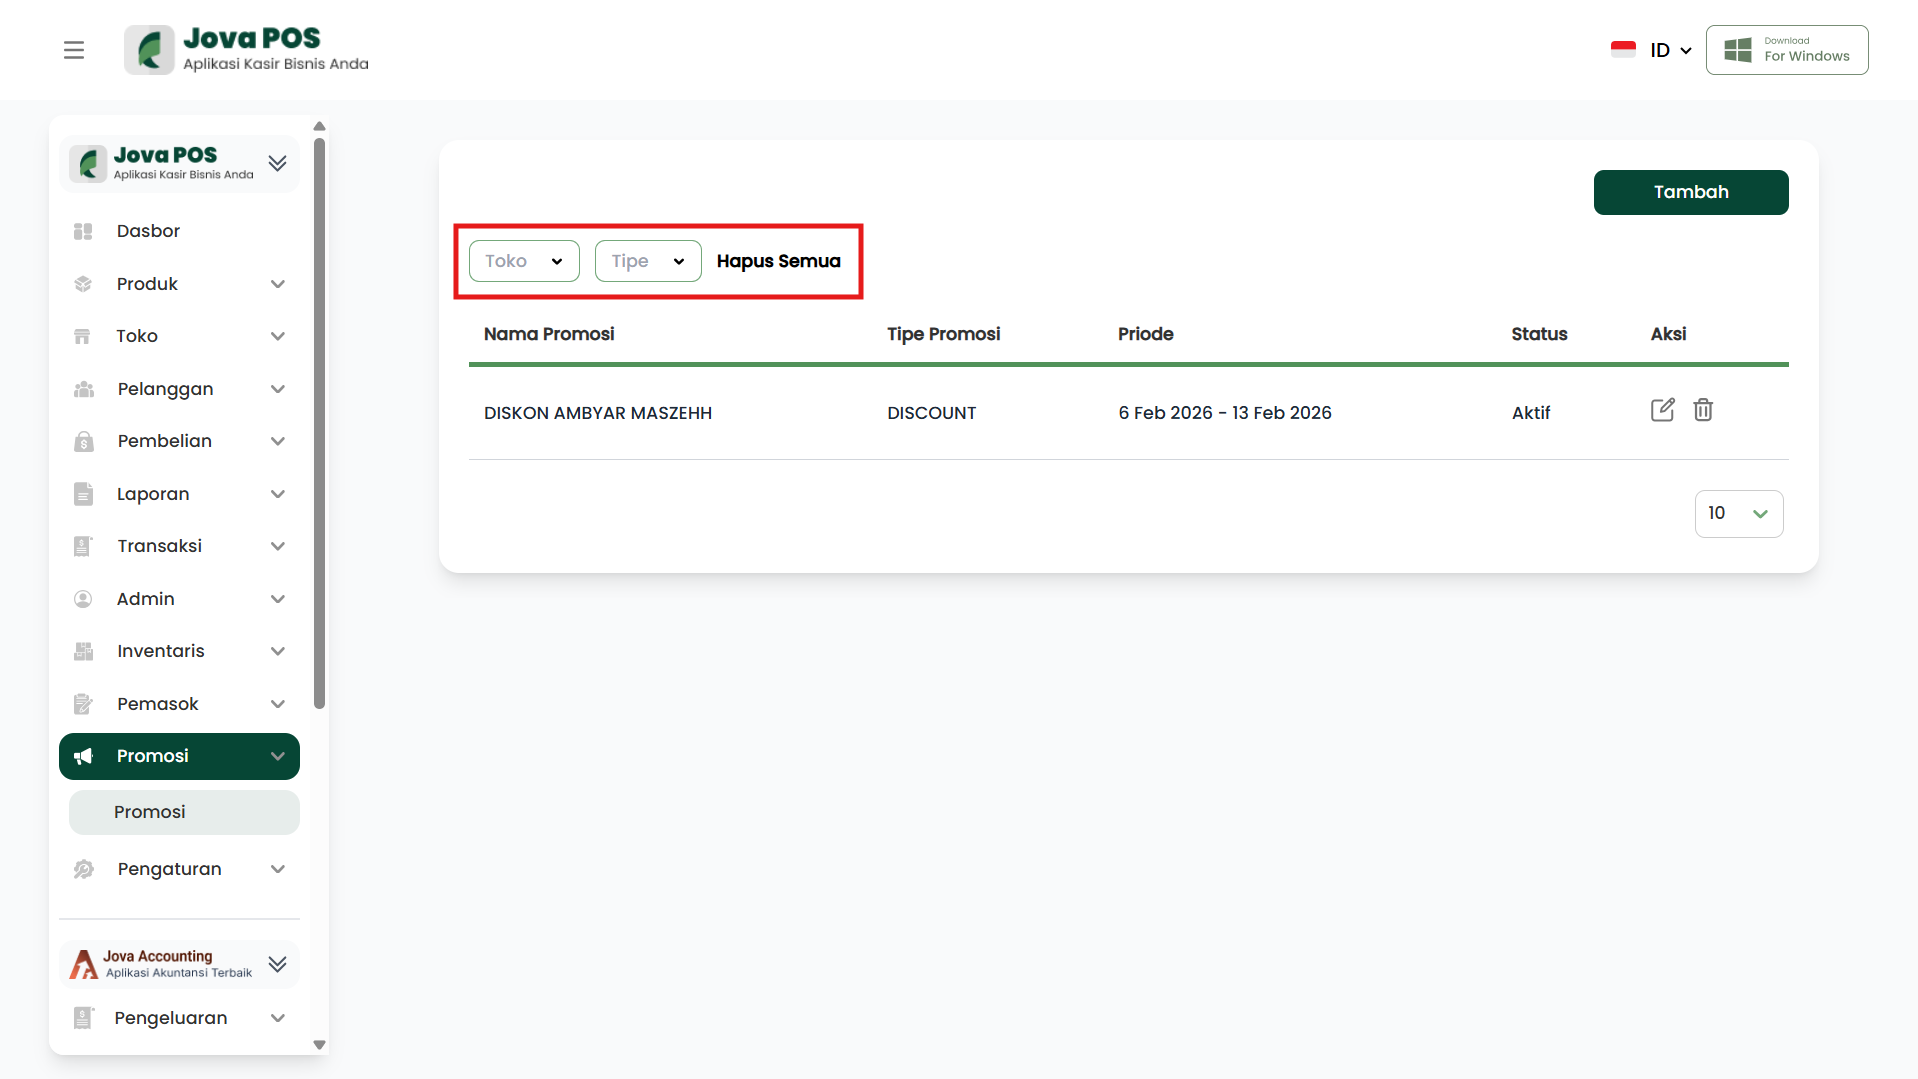
With this search feature, you can easily find the promotion you need.
By following the steps above, you can easily manage promotions in Jova POS using discounts or vouchers according to your business needs.